ComfyUI with DreamShaper and FLUX.1
Run ComfyUI on a GPU-enabled machine managed by CloudRift and learn how to:
- Start a container with ComfyUI.
- Download DreamShaper-V8 or FLUX.1 checkpoints
- Generate images using Comfy web UI.
 |  |
| Images generated using the DreamShaper V∞ model from Civitai. | |
Pull and Run the ComfyUI Image
Once you have rented a GPU (rent at https://neuralrack.ai) and installed CloudRift CLI, run the following Docker command to pull and start the Docker container for ComfyUI:
rift docker -x <executor id> run -p 8188 -e WEB_ENABLE_AUTH=false --name comfyui -it --rm ghcr.io/ai-dock/comfyui:latest-cuda
The rift docker run command will automatically select the executor (machine)
in your rift cluster and start the ComfyUI container. If you have multiple executors
in your cluster, you can specify the executor using -x <executor-name>
command line parameter. Names of the executors in your cluster
can be found by running rift cluster info.
Here's what this command does:
rift docker -x <executor id> run: Pulls the Docker image and starts the container. You can find the executor ID in your workspace summary where your rented your GPU.-p 8188: Maps port 8188 on your server to port 8188 on the container, allowing you to access Comfy web UI.-e WEB_ENABLE_AUTH=false: PassesWEB_ENABLE_AUTHenvironment variable to the container. We disable authentication for simplicity of this tutorial.--name comfyui(optional): Specifies the name for the container allowing you to reference it by this name in other commands, e.g.rift docker execused below to download the checkpoint.-it: Runs the container in interactive mode with a pseudo-TTY, ensuring that container is not stopped while you keep the terminal open (note that it will stop if you close the terminal).--rm(optional): Removes the container when it stops. This is useful when you need to start the container multiple times. If you don't specify it, you'll need to invokerift docker rm <container-id>to remove the container manually. However, if the container is removed, you'll lose all the data stored in it and will need to download the checkpoint again.ghcr.io/ai-dock/comfyui:latest-cuda: Specifies the Docker image to be run.
After running this command, you'll see that the image being pulled and the container started. If the image is already downloaded, it will start the container right away. There will be a lot of log messages, here is how this will approximately look like:
$ rift docker -x c6a827ce run -p 8188 -e WEB_ENABLE_AUTH=false --name comfyui -it --rm ghcr.io/ai-dock/comfyui:latest-cuda
Pulling image 'ai-dock/comfyui:latest-cuda'
[==================================================>]  221.3MB/221.3MB

... lots of log messages ...

==> /var/log/supervisor/quicktunnel-3.log <==
2024-09-09T23:16:56Z INF Registered tunnel connection connIndex=0 connection=264e7605-3daf-47dc-a39b-ec2f698b757d event=0 ip=198.41.192.227 location=sjc01 protocol=http2

==> /var/log/supervisor/supervisor.log <==
2024-09-09 23:16:56,219 INFO exited: sshd (exit status 0; expected)

==> /var/log/supervisor/syncthing.log <==
[NFAZS] 2024/09/09 23:17:11 INFO: quic://0.0.0.0:22000 detected NAT type: Port restricted NAT
[NFAZS] 2024/09/09 23:17:11 INFO: quic://0.0.0.0:22000 resolved external address quic://98.42.0.120:22000 (via stun.syncthing.net:3478)
[NFAZS] 2024/09/09 23:17:12 INFO: Detected 0 NAT services
[NFAZS] 2024/09/09 23:18:10 INFO: Joined relay relay://193.160.32.204:22067
If you need to close the terminal window, but you want your container to keep running, press Ctrl-P followed by Ctrl-Q. This will detach the terminal from the container.
If you press Ctrl-C or Ctrl-D, the container will stop. Also, you can specify -d flag
instead of -it to run the container in the background when launching it.
Ensure ComfyUI is Up and Running
To confirm that the container is running, you can run rift docker ps command. It will show you the list of running containers:
$ rift docker ps
 EXECUTOR                                      CONTAINER ID  IMAGE                                COMMAND  CREATED              STATUS   NAMES
 c6a827ce-1728-11f0-94eb-f77f736915a8          37803ae894d9  ghcr.io/ai-dock/comfyui:latest-cuda  init.sh  2024-08-31 17:39:29  Running  /comfyui
Open the browser and type in http://{node-IP-address}:8188 URL. Replace {node-IP-address} with the IP address received while renting the
CloudRift GPU, or run rift cluster info to get the IP address of the executor. The output should look like this:
rift cluster info
Download Checkpoint
A lot of checkpoints are available at Civit.ai. In this tutorial we will be using the DreamShaper-V8 checkpoint.
To download the checkpoint:
- Connect to the container using
rift docker exec -it comfyui bashcommand: - Run
cd /opt/ComfyUI/models/checkpoints/to navigate to the checkpoints directory. - Run
wget https://civitai.com/api/download/models/128713 --content-dispositioncommand to download the checkpoint.
Here is the example of running the aforementioned command:
$ rift docker exec -it comfyui bash
(comfyui) root@957ce9414eea:/opt# cd /opt/ComfyUI/models/checkpoints
(comfyui) root@957ce9414eea:/opt/ComfyUI/models/checkpoints# wget https://civitai.com/api/download/models/128713 --content-disposition
Resolving civitai.com (civitai.com)... 172.67.12.143, 104.22.18.237, 104.22.19.237, ...
... lots of log messages ...
dreamshaper_8.safet   100%[=====================================>]   1.99G  12.1MB/s    in 60s
2024-08-31 17:54:55 (33.9 MB/s) - ‘dreamshaper_8.safetensors’ saved [2132625894/2132625894]
Start Using ComfyUI
Open the browser and type in http://{node-IP-address}:8188 URL. Replace {node-IP-address} with the IP address of the
executor that you can get by running rift cluster info command.
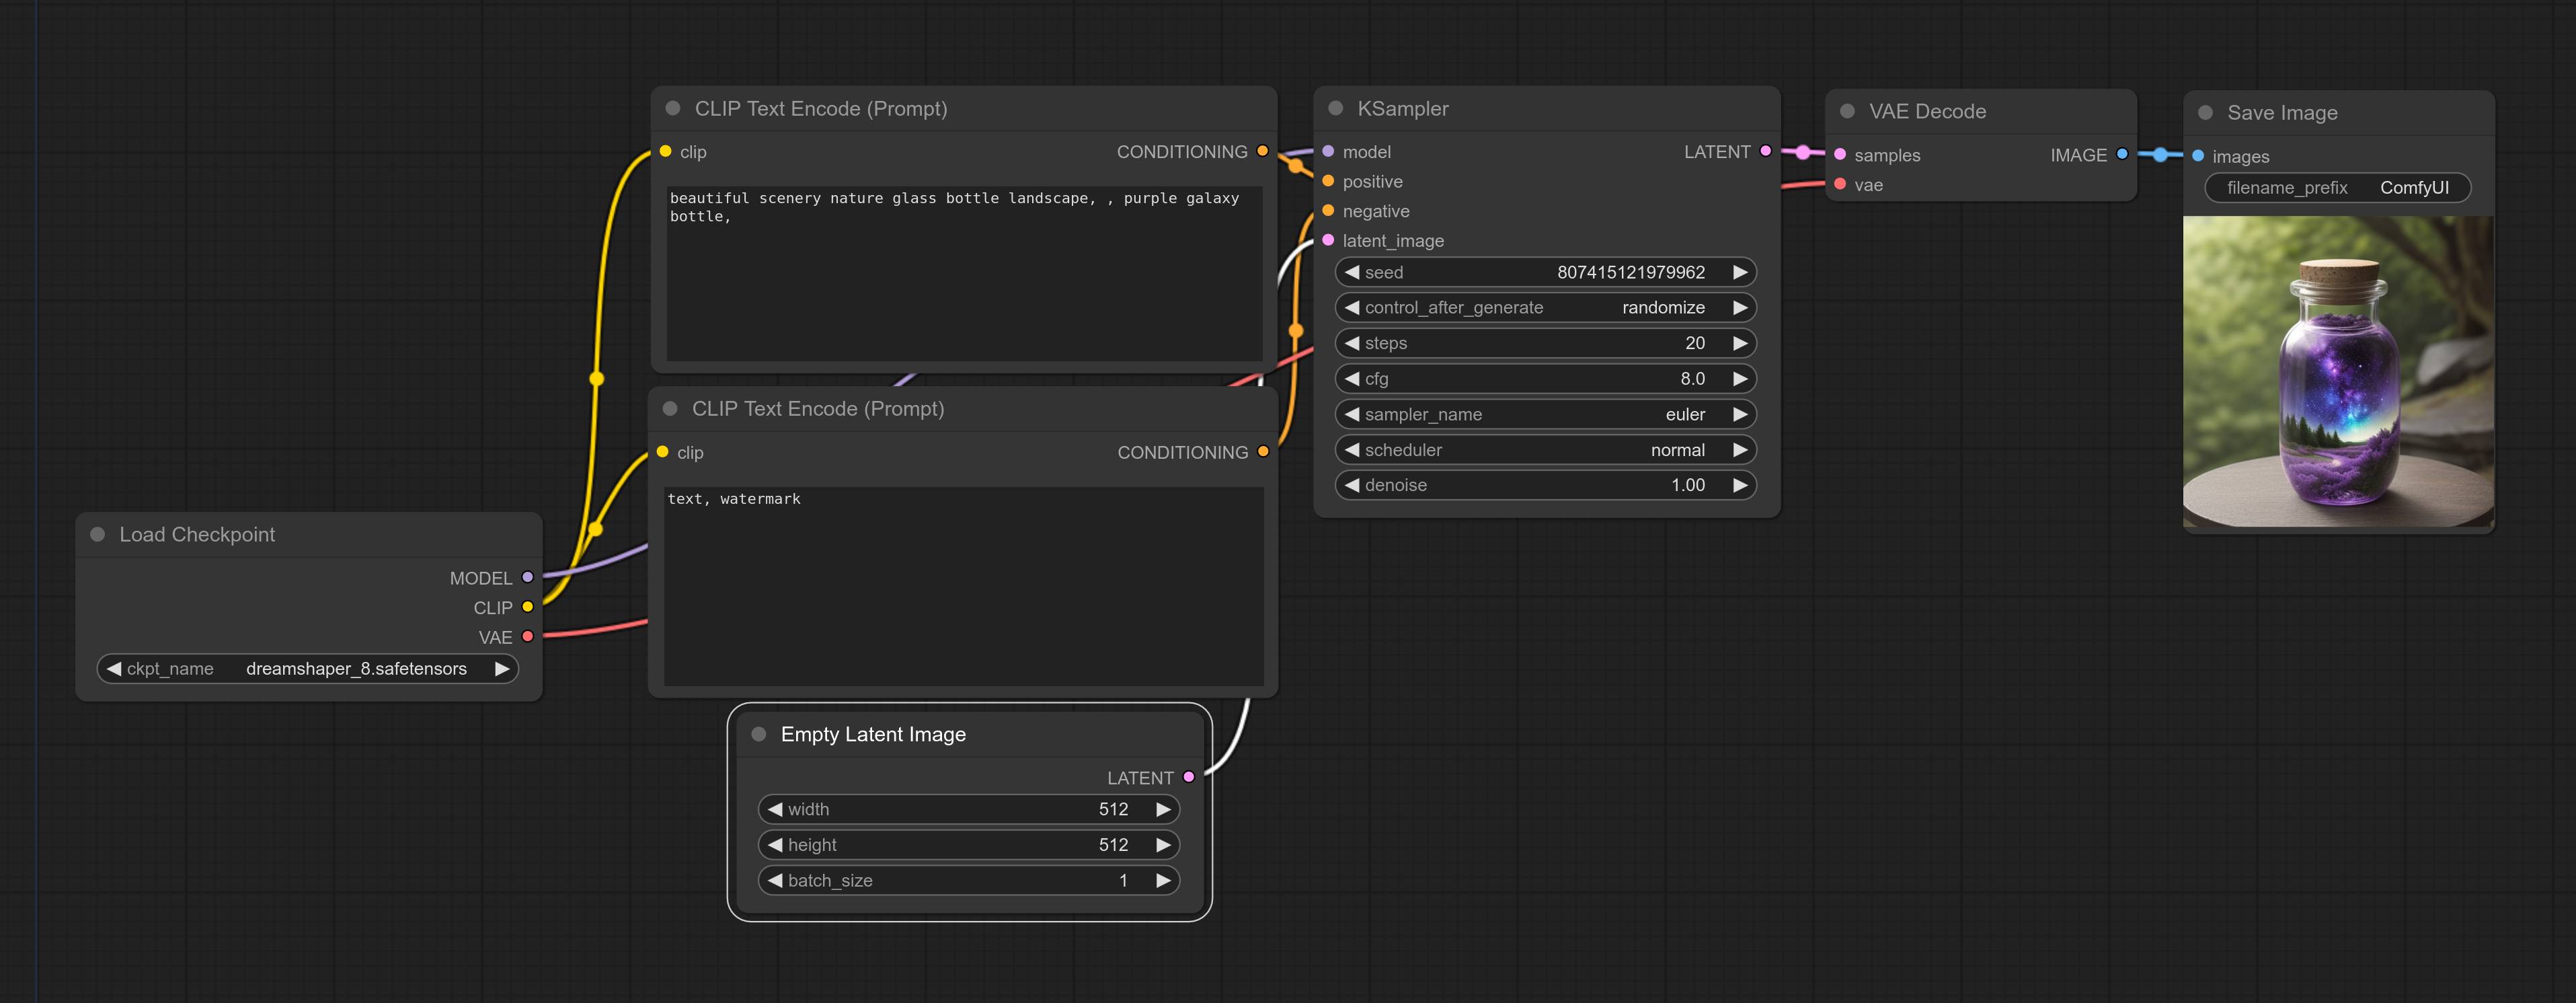
You should see the ComfyUI web interface. Click "Queue Prompt" to generate images using the DreamShaper checkpoint.

Generate with FLUX.1
You can download FLUX.1 checkpoint from the Comfy Flux Checkpoint Page.
Right-click on the download button and select "Copy link". Then use the wget command to download the checkpoint to the container.
Here is an example:
$ rift docker exec -it comfyui bash
(comfyui) root@957ce9414eea:/opt# cd /opt/ComfyUI/models/checkpoints
(comfyui) root@957ce9414eea:/opt/ComfyUI/models/checkpoints# wget https://huggingface.co/Comfy-Org/flux1-schnell/resolve/main/flux1-schnell-fp8.safetensors
... lots of log messages ...
flux1-schnell-fp8.safetensors   100%[=====================================>]  16.05G   190MB/s    in 58s
2024-09-09 23:10:44 (282 MB/s) - ‘flux1-schnell-fp8.safetensors’ saved [17236328572/17236328572]
Refresh the ComfyUI web interface. You should see the FLUX.1 checkpoint available in the "ckpt_name" field of the "Load Checkpoint" module. Select the FLUX.1 checkpoint.
To get better results set cfg=1.0.
Hit "Queue Prompt" to generate image - it should take around 4 seconds on RTX 4090.
Don't forget to stop the executor once you're done using it to avoid unnecessary charges.