Oobabooga WebUI
Run Oobabooga LLM WebUI using the CloudRift platform.
Oobabooga features:
- OpenAI-compatible API server with Chat and Completions endpoints.
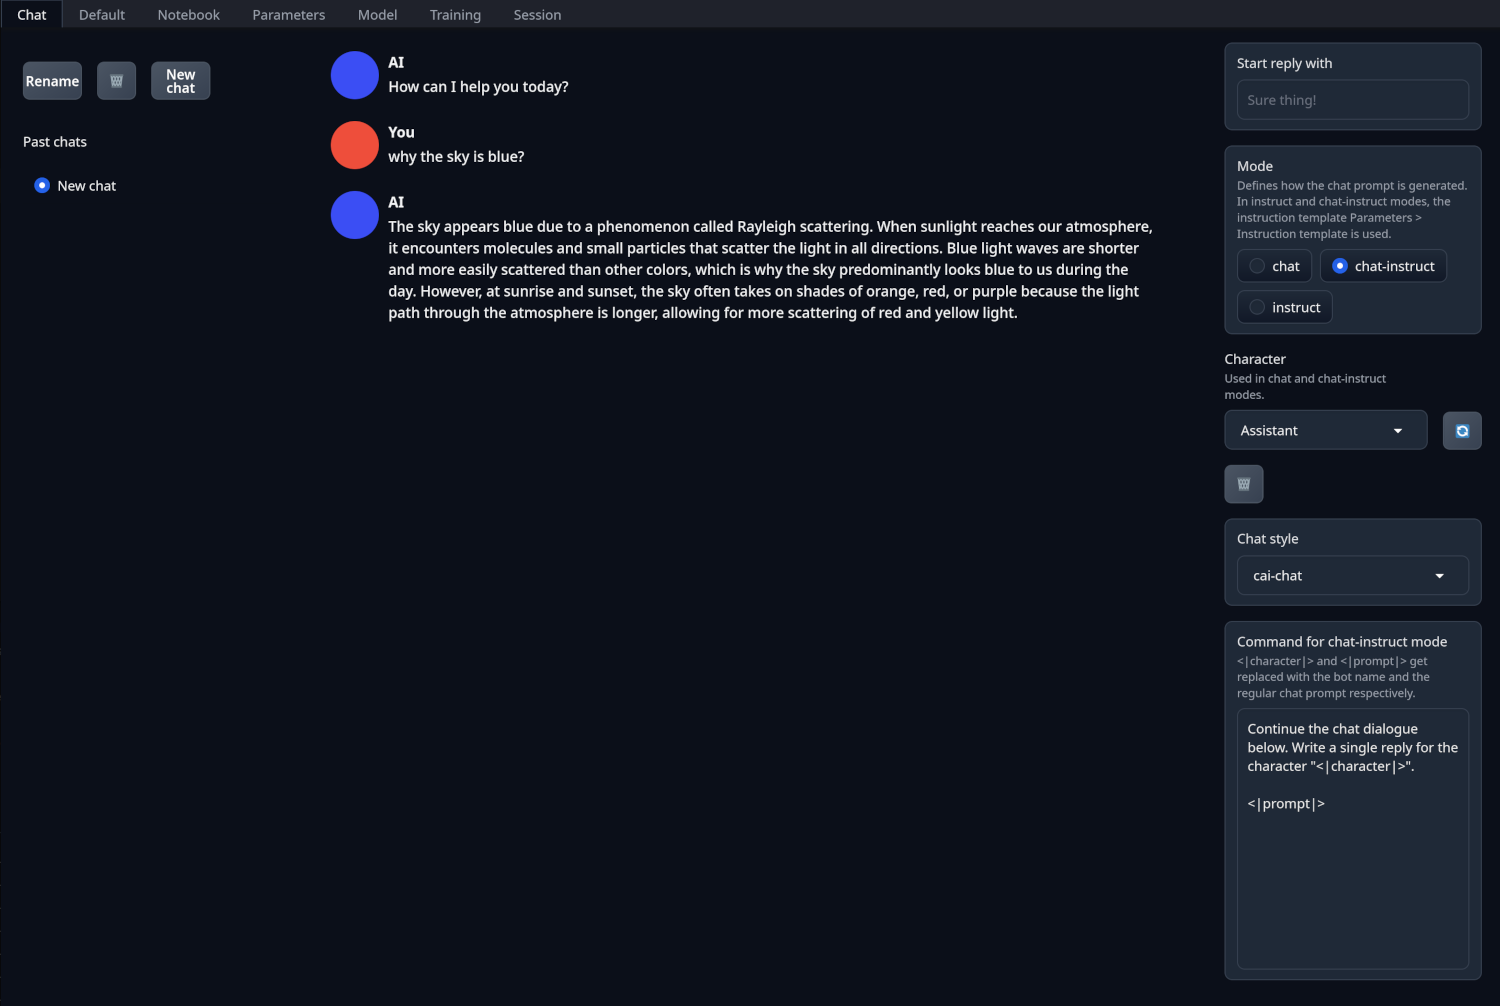
- Three chat modes: instruct, chat-instruct, and chat, allowing for both instruction-following and casual conversations with characters. chat-instruct mode automatically applies the model's template to the chat prompt, ensuring high-quality outputs without manual setup.
- "Past chats" menu to quickly switch between conversations and start new ones.
- Free-form generation in the Default/Notebook tabs without being limited to chat turns. Send formatted chat conversations from the Chat tab to these tabs.
- Multiple sampling parameters and generation options for sophisticated text generation control.
- Simple LoRA fine-tuning tool to customize models with your data.
In this tutorial, we will explore how to run Oobabooga LLM WebUI using the CloudRift platform.
Start Oobabooga LLM WebUI
We will be using Atinoda/text-generation-webui-docker Docker image for this tutorial. Once you have rented a GPU (rent at https://neuralrack.ai) and installed rift tools, run the following Docker command to pull and start the Oobabooga container.
rift docker run -p 7860 -x EXTRA_LAUNCH_ARGS="--listen --verbose" -it --name oobabooga atinoda/text-generation-webui:default-nvidia
The rift docker run command will automatically select the executor (machine)
in your rift cluster and start the Oobabooga container. If you have multiple executors
in your cluster, you can specify the executor using -x <executor-name>
command line parameter. Names of the executors in your cluster
can be found by running rift cluster info.
Here's what this command does:
rift docker run: Pulls the image and starts the container.-p 7860: Maps port 7860 on your server to port 7860 on the container, allowing you to access Oobabooga.-x EXTRA_LAUNCH_ARGS="--listen --verbose": Passes environment variables to the container to enable listening and verbose mode.-it: Runs the container in interactive mode with a pseudo-TTY, ensuring that container is not stopped while you keep the terminal open (note that it will stop if you close the terminal).--name oobabooga(optional): Specifies the name for the container allowing you to reference it by this name in other commands.--rm(optional): Removes the container when it stops. This is useful when you need to start the container multiple times. If you don't specify it, you'll need to invokerift docker rm <container-id>to remove the container manually. However, if the container is removed, you'll lose all the data stored in it and will need to download the checkpoint again.atinoda/text-generation-webui:default-nvidia: Specifies the Docker image to be run.
After running this command, you'll see output similar to the following:
=== Running text-generation-webui variant: 'Nvidia Extended' v1.14 ===
=== (This version is 4 commits behind origin main) ===
=== Image build date: 2024-08-20 21:23:03 ===
23:49:23-157933 INFO     Starting Text generation web UI
23:49:23-162344 WARNING
                         You are potentially exposing the web UI to the entire internet without any access password.
                         You can create one with the "--gradio-auth" flag like this:

                         --gradio-auth username:password

                         Make sure to replace username:password with your own.

Running on local URL:  http://0.0.0.0:7860
To prevent others from accessing the Oobabooga LLM WebUI, you can set a password by adding the --gradio-auth flag
using -x EXTRA_LAUNCH_ARGS="--listen --verbose --gradio-auth username:password" to the rift docker run command.
If you need to close the terminal window, but you want your container to keep running, press Ctrl-P followed by Ctrl-Q. This will detach the terminal from the container.
If you press Ctrl-C or Ctrl-D, the container will stop. Also, you can specify -d flag
instead of -it to run the container in the background when launching it.
Open Oobabooga LLM WebUI
Open the browser and type in http://{oobabooga-IP-address}:7860 URL. Replace {oobabooga-IP-address} with the IP address
received while renting the machine, or run cluster info command to get see IP addresses of your executors.
rift cluster info
Download and Select Model
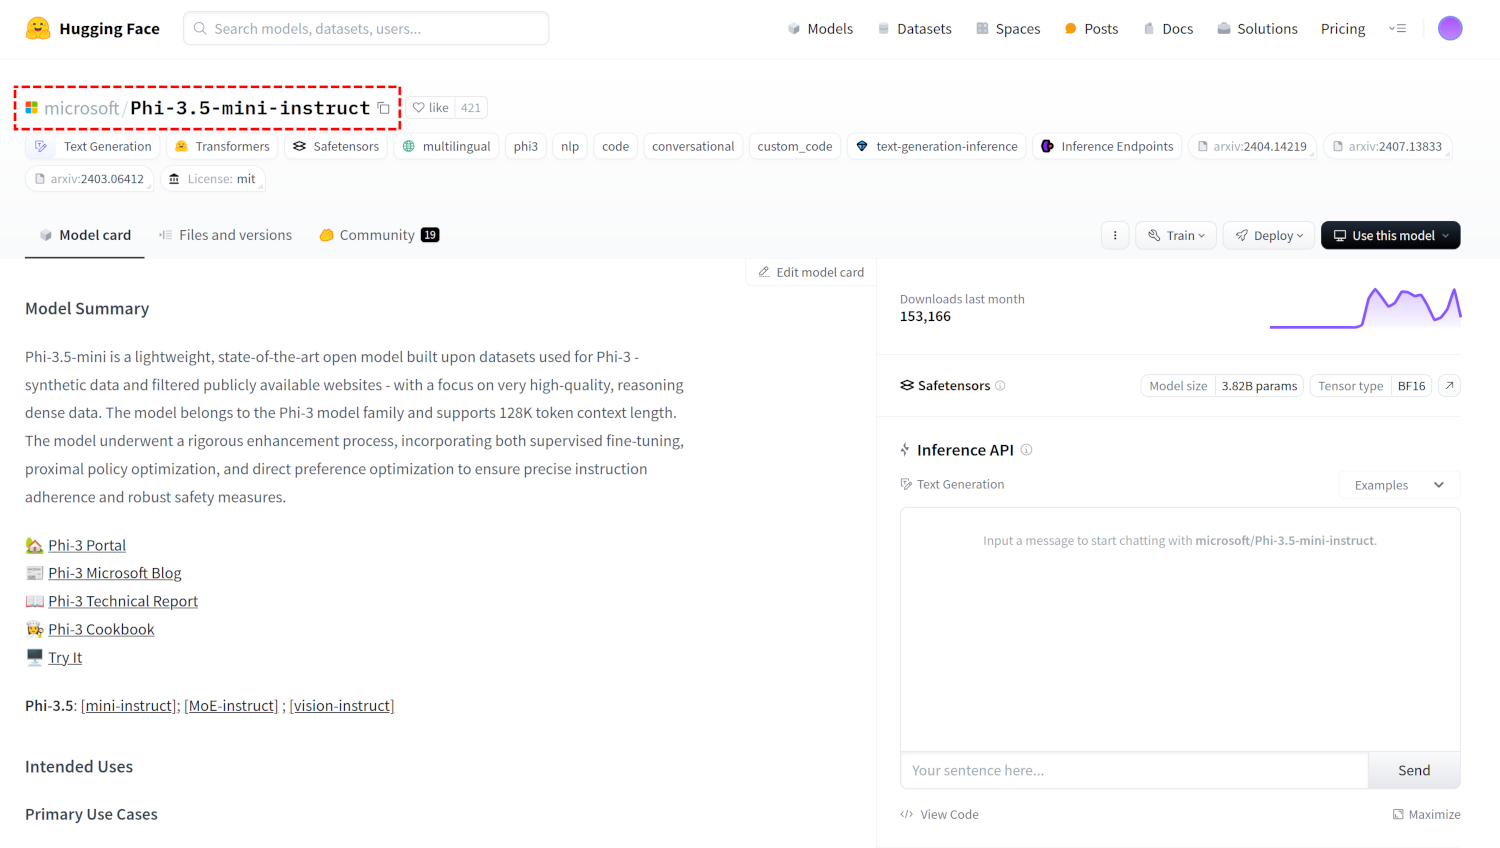
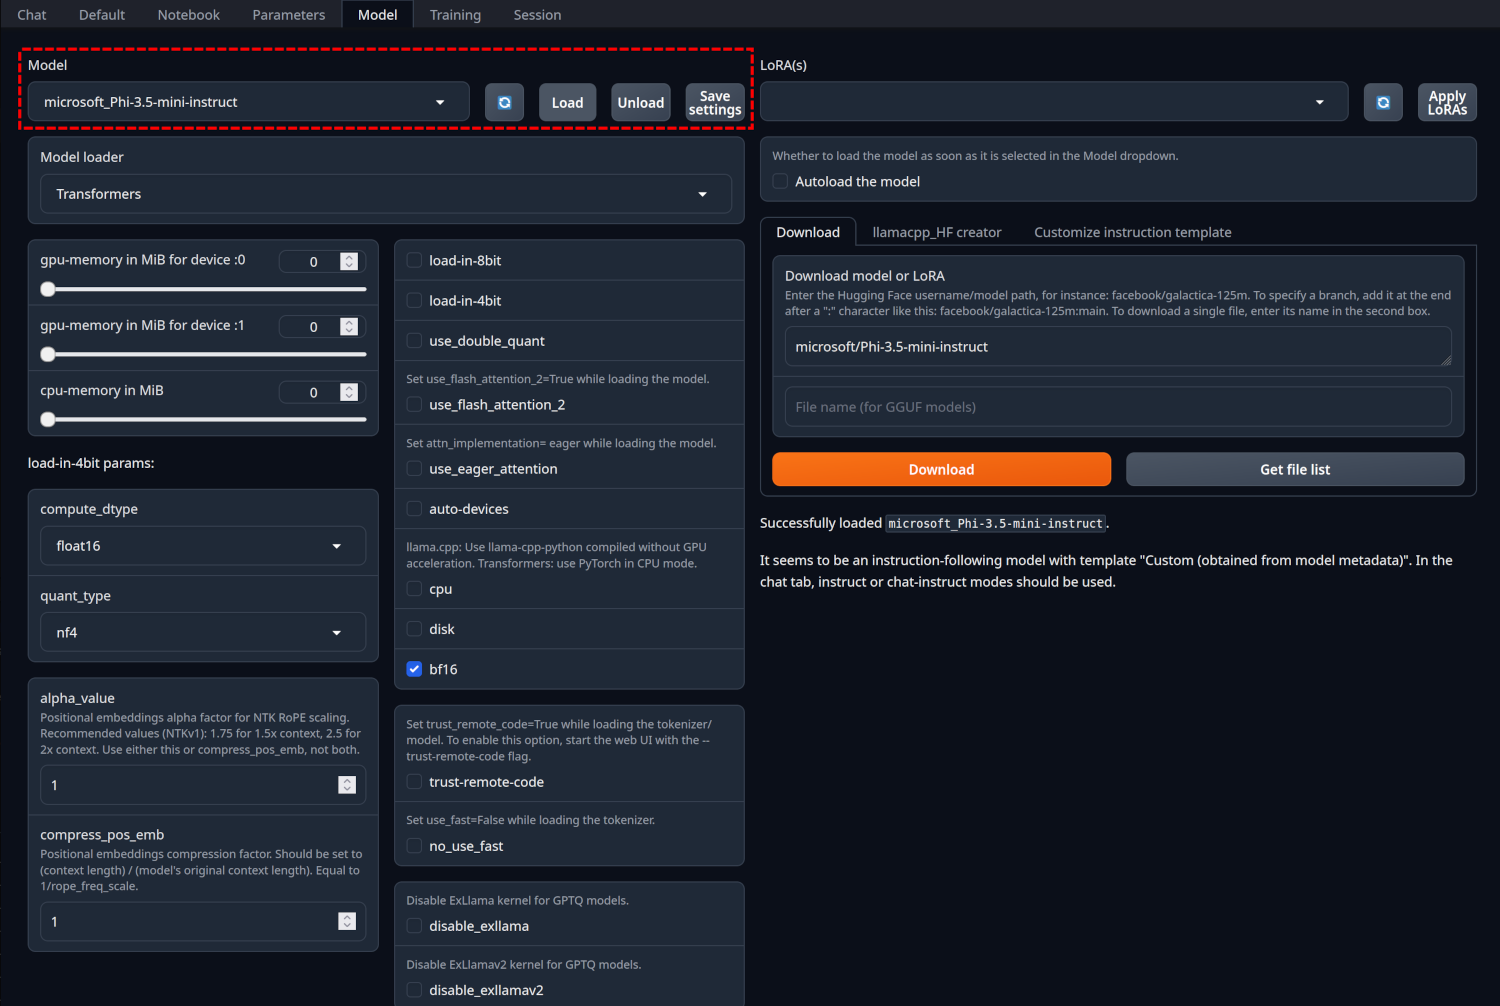
In this tutorial we will be using the microsoft/Phi-3.5-mini-instruct model. Note that you can use most of the
Hugging Face Text Generation Models
with the Oobabooga LLM WebUI. Just copy the model name and paste it in the model name field.
Navigate to the model tab and download the desired model by pasting its name in the model name field and clicking the download button.
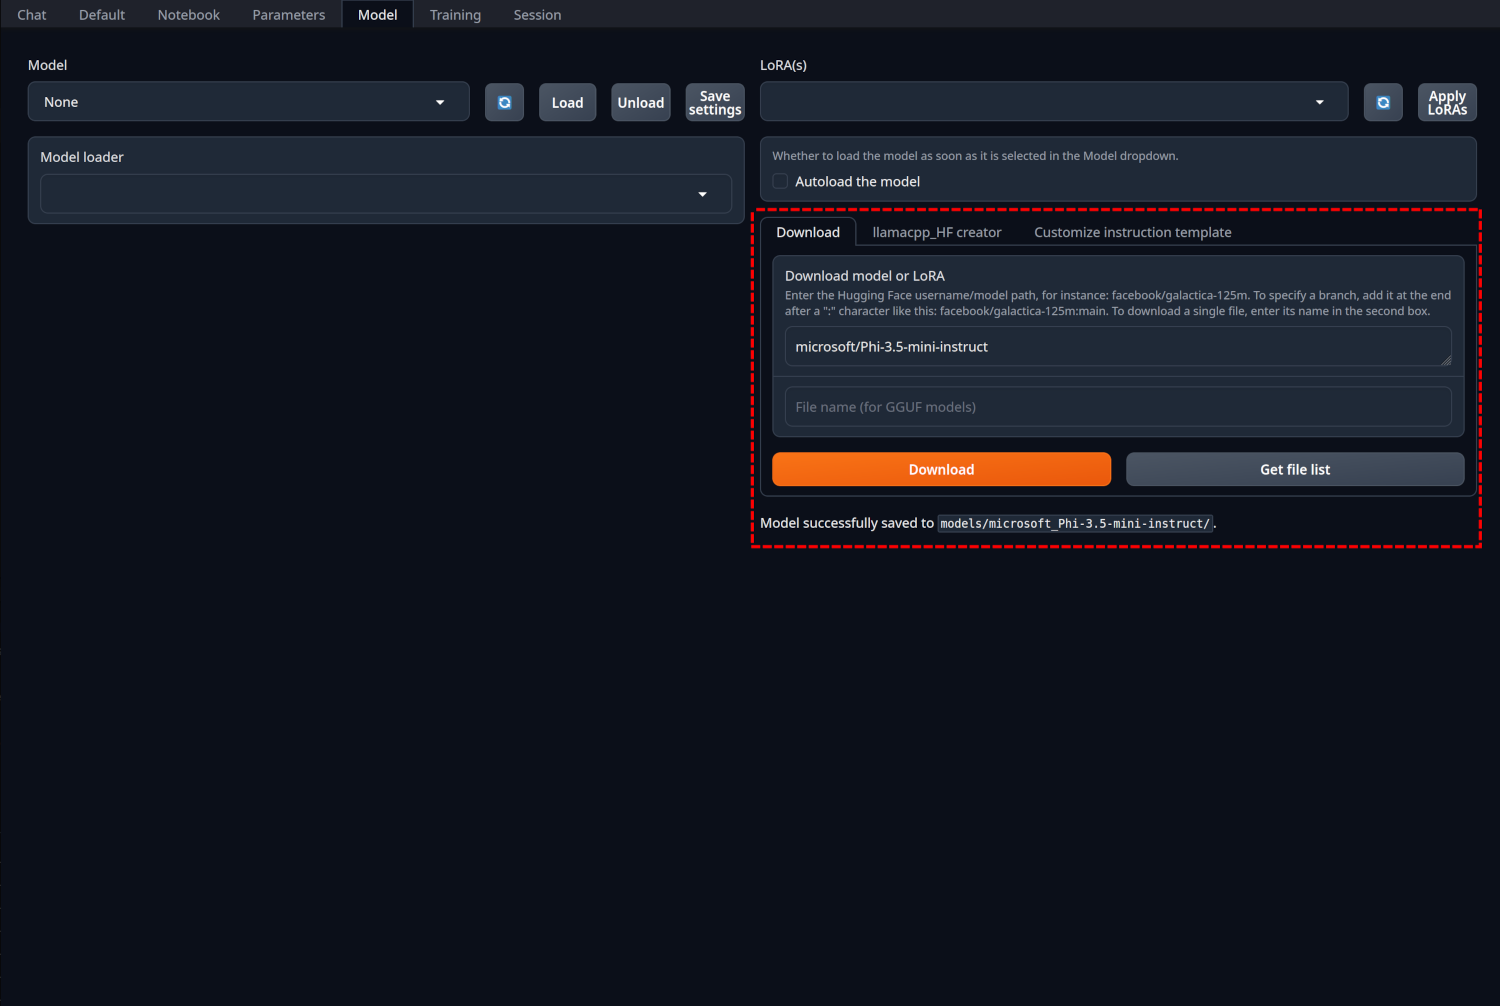
Then hit the refresh button near model selection, select the downloaded model and click "Load".
Generate Text
Once the model is loaded, navigate to the "Chat" tab and start generating text.
